Hello from not so sunny Scotland! I haven't forgotten you all, it's just taken me longer than expected to get organised, and I also wanted to have something good to share....... but first....
Scotland in the rain is lovely; I'm really enjoying my new job and I love my new home. This is the view from my kitchen window -

and these were my moving in treat to myself...

I can see a loch from my bedroom window, but I'm not taking any pics until I can get out there when the sun is shining, and that has only happened so far while I've been at work. Of course this time of year it's barely light when I go to work and nearly dark when I finish, so opportunities are few...
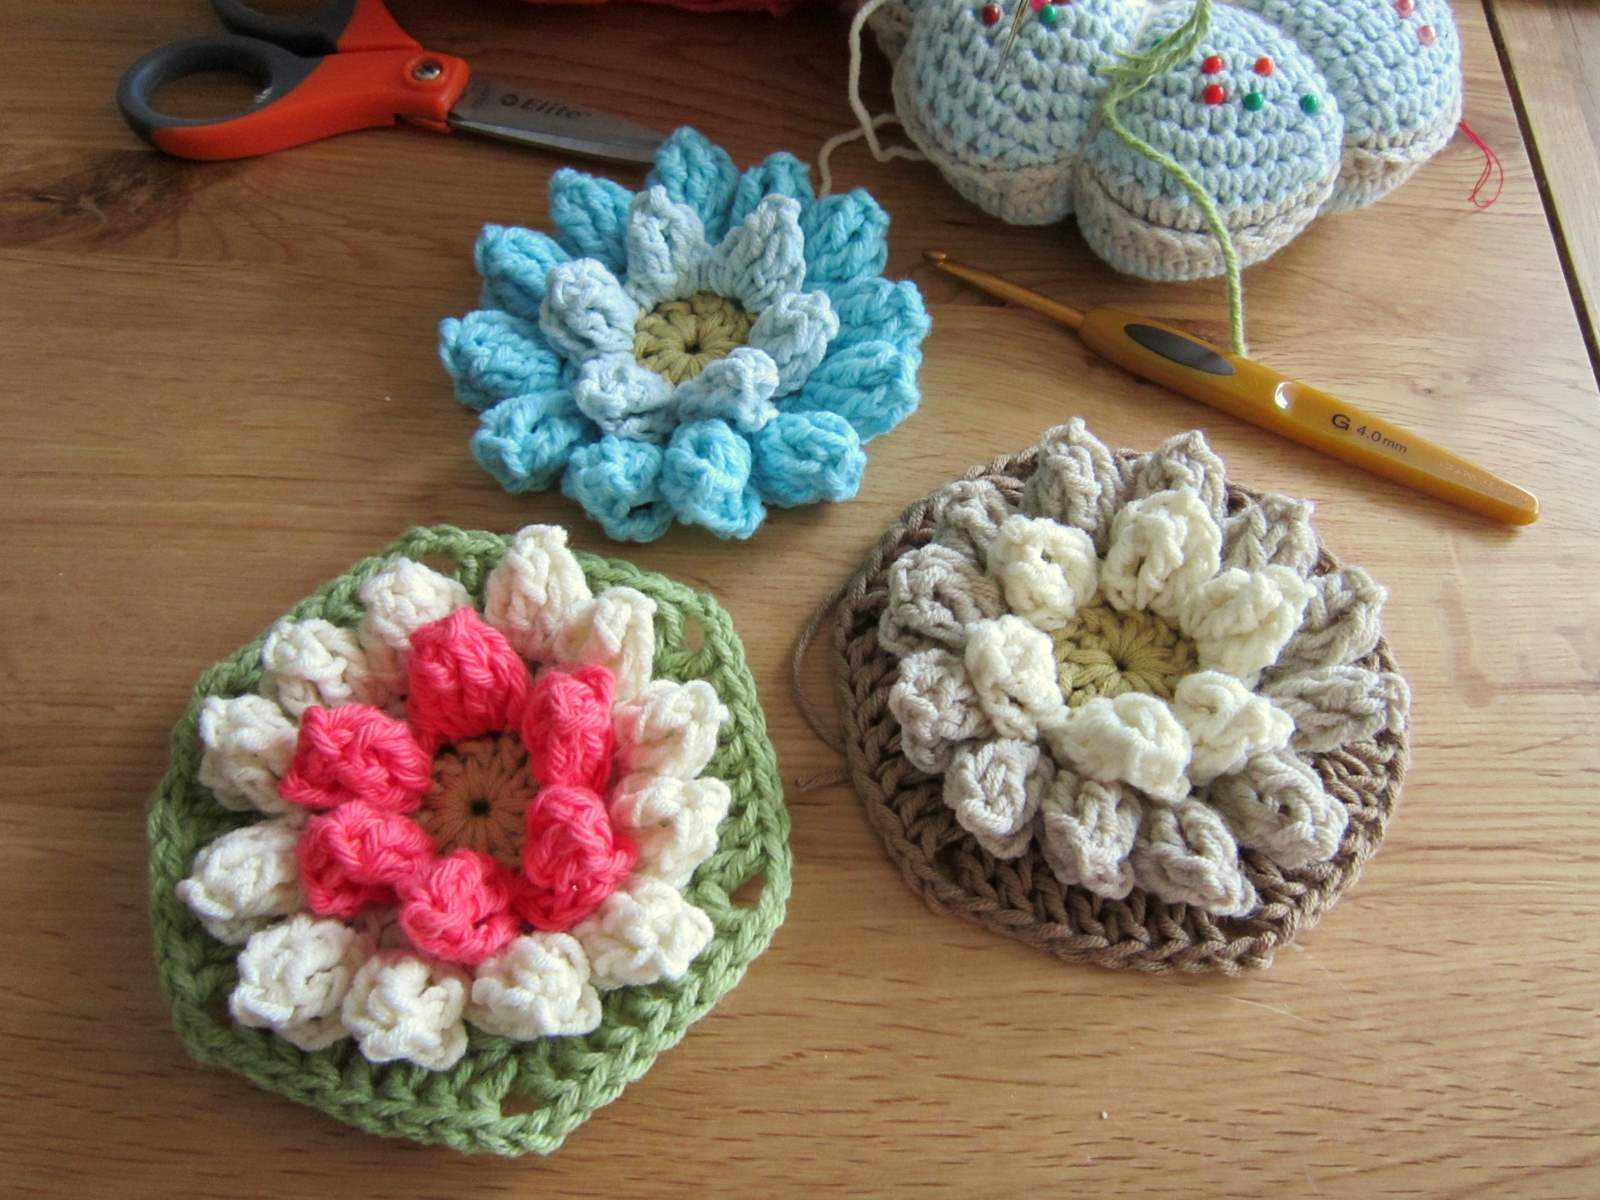
Now enough of the necessities of life and on to the good stuff! I'm brimming over with new ideas at the moment, and I have lots of new projects on the go. One of the first is a progression from the puffed daisy hexagon; I can hear the shouts of "ARE YOU NOT SICK OF BOBBLES YET?", and the answer is NOOOOOOOOOoooooooooo..... I wanted to see what another round of bobbles would look like behind the first row, and they look awfully good (imo!!).

And if you look from the side I think they look rather like lily pads......

Now I'm aware that my instructions for the puffed daisy hexagon has stumped some readers who are not quite as experienced in the crochet techniques required, so I have produced a photo-heavy tutorial below that I hope can be followed by all. I use american crochet terminology, dk cotton and a 4mm hook. Abbreviations - ch - chain; dc - double crochet; sl st - slip stitch; sts - stitches, tc - treble crochet.
Lily Pad Hexagons
I NOW HAVE A NEW WEBSITE AND THIS PATTERN CAN BE FOUND AT -
http://psicrochet.com/portfolio-items/lily-pad-hexagons/


Before you ask, no I haven't photographed them in sepia... I can do subtle, natural tones!!!
Granny Bobble Blanket; just a note to say that I have edited the pattern; it just didn't lie flat in the middle, so I've taken the whole first row out, started again with a magic circle and worked the second row directly into that. This works much better and finally lies flat! Please accept my apologies anyone who has started this already and aleady found the problem; that will teach me for sharing too soon....

Finally thank you all for the most welcome comments and well wishes on my move; all most appreciated, thank you xxxxxxxx. And a big welcome to my new followers - of which there are now over 100 so thank you again!!
I'll be back soon and in the meantime happy crocheting!!
xx
I love these lily pad motifs - very creative. :)
ReplyDeletethankes to Dr oniha, who cured me of fallopian tube blockage and fibroid. i married for over eight years wthout a child of my own. because of the problem with my fallopian tubbe and fibroid, until i came in conntact with Dr oniha's testimony and recommendations online, on how he has cured and healed so many people of the same illment, and i decided to contact him, and he administered his medicatons on me, and i became pregnant in two monnths. incasse you wannt to reach him for a similar problem, yoou can call or whatsap him on +2347089275769 or email: dronihaspell@yahoo.com
DeleteIt's so cute!
ReplyDeleteThank you so much to teach us!
best wishes from Brazil :-)
Debora
Beautifully done and written! I'll be trying these very soon! Love them all joined together...looks like a wonderful piece of work developing! Thanks for sharing!!!! Annette
ReplyDeletevery nice lily pads! thank you for the tutorial!
ReplyDeleteI love these lily pads! Thanks so much for the fab tutorial - I will definitely be referring back to this to give them a try :) Maggie xx
ReplyDeleteThis is gorgeous , I love flowers and love to crochet them too ...but this one is unique ....Love this pattern .....wonderful job .Thanks for the tutorial,sure I will make it.have a wonderful week and Happy Crocheting :) !
ReplyDeleteohhh!!! muy chulas,me encantan como te quedan,un besazo
ReplyDeleteHow beautiful, I've just Pinned them for future reference. I do like both versions of your hexagons the bright coloured ones and the natural tones. The photo tutorial is great, thanks for sharing.
ReplyDeleteThank you thank you Karen for this very clear tutorial!! You are so sweet to share! I am with you, girl!! Not fed up of bobbles yet!! lol!
ReplyDeleteI will pin them on my board for not so future reference!!
Have the best week!!!
bisoudisouxxxxxxxxxxxxxxxx
These are beautiful! Thanks for the tutorial :)
ReplyDeleteHola Karen me encantan esas bellas flores y se adaptan a muchos trabajos, divinas estuve recorriendo tu blog y e visto trabajos preciosos me sumo a tus seguidores un beso Sandra.
ReplyDeleteHola karen he encontrado tu blogs por casualidad y me quedo en el ,me gusta lo que haces y tus tutoriales son geniales.Saludos
ReplyDeleteGreat,
ReplyDeletei like it.
thats so cute!
Conny
Hi Mrs Karen ....just to let you know that I have made the Lily Flower.Would you like to seeit...? :) Welcome !
ReplyDeleteLinda a flor, obrigada por compartilhar. Bjs
ReplyDeleteJeanne
Divine flower!
ReplyDeleteThanks for the pattern!
You live in a beautiful place ...
Kisses!
Hi Everyone, thanks to you all for the lovely comments. For those who need help with a magic circle there are lots of wonderful tutorial videos on utube, this is only one link - http://www.youtube.com/watch?v=9c09o50f_Hk&feature=related
ReplyDeleteAnd to Luna, thank you in particular; your words are truly kind, and I love your flower, and it was so kind that you wrote your post in English!! If others want to see Luna's great blog the link is - http://alunamistejidos.blogspot.com/
Karen
xx
so cute!
ReplyDeleteThank you for the tutorial. I indicated it in my "best links of the week". :-)
x
Debora (Brazil)
Hi Karen - if you participate in blog awards, I have one for you on my blog. Have a good day. :)
ReplyDeleteI simply love your lily pad motifs. Thank you for sharing them with us all. I've just 'found' your blog courtesy of Debi Y :)
ReplyDeletelove the lily pads!
ReplyDeleteI have an award for you over at my blog, if you would like to accept. If you don't participate in blog awards, that's fine, I just wanted to show you my appreciation for your blog.
littleorphanskein.wordpress.com
One of my greatest wishes is to see Scotland, Ireland and England. I'm looking forward to seeing more pictures of your new home...both inside and out :)
ReplyDeleteI just LOVE these lily pad hexagons!!! Thanks so much for the tutorial. I must give them a go :)
I have made them following your instructions.. They are beautiful. Many thanks for the tuto. Jewel
ReplyDeleteMany thanks, I've just had a long break from crochet and have returned gobsmacked, your work is so inspiring,thanks for sharing so generously, appreciate it.
ReplyDeleteGreat Flower hexagon tutorial! Thank you so much! It's very lovely!
ReplyDeleteWhat great tutorials you have on your blog! They are all so informative and I like the different colors for different rounds so you can follower easier! I found you on the blog hop and am your newest GFC follower! I'd love for you to stop by and visit my blog and perhaps follow back. Have a wonderful end of week!
ReplyDeleteMarilyn
4you-withlove.blogspot.com
This is a great tutorial, i really enjoyed making your almondflower.
ReplyDeleteI want to make the bag for my best friend!
Thank you for this great pattern!
wow, wonderful, I love it!!!
ReplyDeletethank you for the Tutorial
greetings
Traudi
What lovely motifs they are think I need to have a go thanks.
ReplyDeletethis motif is soooo cute!!!! ask your permission to post and name you on my blog please .... tejespiderteje.blogspot.com thanks for being so nice and teach us !!!
ReplyDeleteHi Patty; thank you so much. And post the pattern with my pleasure; thanks for asking.
DeleteKaren
xx
You are amazing! Thank you so much for solving the mystery for me, I LOVE the lotus flower but I couldn't figure it out. Your tutorial is brilliant and now I'm off with the pattern practically memorized already!
ReplyDelete~CuriousTiff
These are gorgeous! As all of your amazing patterns are. Hope you won't mind... Linking up at Tangled Happy tomorrow. Thanks so much for sharing this! :)
ReplyDeleteWow, these are beautiful. Found your blog through Tangled Happy. Great tutorial. A must try.
ReplyDeleteTeresa
I love these! It would make such a beautiful vintage blanket. I also just foudn tour blog today and totally love it!
ReplyDeleteLovely crochet!!!
ReplyDeleteThanks for the instructions ...
Happy crocheting *.*
Well, I just discovered your blog by way of Ravelry and a pattern by Annas Kertje, who listed your blog as a fav. Yes, I love the bobbles. What you are working on is so beautiful and makes me smile -- and I need that badly right now. Maybe getting the supplies and working on some of these would help:) Thank you for this beauty.
ReplyDeleteThose are beautiful! Thanks for the tutorial! I love the pin cushion in the background as well! Just found my way to your blog from another crochet site...and very glad I did! You have lovely things to look at! Hope you have a great day!
ReplyDeleteSo brilliant , lve these just made one myself , great tutorial thank you , just need to figure out what to do with them :) need to finish my granny stripe first though :)) thank you again !!!
ReplyDeleteThank you for the tutorial. Very, very nice.
ReplyDeleteThese are so beautiful! I am going to give them a try soon. Thanks for the tutorial! And I must say that I really like your blog!
ReplyDeletei have just discovered your blog . . . love the hexie AND you are living in scotlabd . . . yoo cool. sorry about no caps. i'm typing with a 75 pound dog who is scared of storms lying on my left hand . . . lolol
ReplyDeleteI'm attempting to make this with the flower having a brown center,and the petals in golden yellow to look like a sunflower, and the lily pad color in a soft sage green. I hope it turns out even half as beautiful as yours. Thank you for sharing this...it is gorgeous. I plan to sell this one in an auction to raise money for childhood leukemia.
ReplyDeleteYOUR TUTORIAL HELP ME ALOT THANK YOU
ReplyDeleteI found your post from tangledhappy.com 's blog. I love these. They are so cute! I pinned them to my pinterest "crochet" list of things I want to try.
ReplyDeletegrazie!veramente brava!
ReplyDeleteI absolutely love this tutorial, the pictures really help me grasp how to make these beautiful flowers! I can't wait to give it a try! Thank you for such a wonderful post!
ReplyDeleteI really love this. Thank you!
ReplyDeletehttp://gmaellenscraftycorner.wordpress.com/
Hola y gracias por el tutorial. Me encanta la flor¡¡¡.
ReplyDeleteBesos.
Susana.
I can't see where you indicate what type of yarn and hook size to use. I love this project and would like to give it a go. Please advise.
ReplyDeleteIt says above - "Now I'm aware that my instructions for the puffed daisy hexagon has stumped some readers who are not quite as experienced in the crochet techniques required, so I have produced a photo-heavy tutorial below that I hope can be followed by all. I use american crochet terminology, dk cotton and a 4mm hook. Abbreviations - ch - chain; dc - double crochet; sl st - slip stitch; sts - stitches, tc - treble crochet."
DeleteHi Karen I love the Daisy Hexagon you used on purse. I like yo know is this American Terms?
ReplyDeleteHugs Joan,
GRACIAS POR COMPARTIR
ReplyDeleteI LOVE this hexagon pattern! I'm working on a hexagon blanket right now, but I am adding your adorable purse to my project list. Thank you so much for generously sharing the pattern with us!
ReplyDeleteThis is beautiful!
ReplyDeleteDivine flower!
ReplyDeleteThanks for the pattern!
kisses,
Simone Bitar
Very pretty!! I will be making several, I'm SURE; but most immediately, one will be adorning a plastic bag holder I'm presently making for Dear Daughter's new house! I will post it when I'm done with it, so thank you in advance for sharing your pattern!.. Wishing you a very Happy Mother's Day weekend! ~tina
ReplyDeleteThanks for a lovely lily tutorial! http://torirotsstitches.blogspot.com/2012/05/calling-out-for-summer.html
ReplyDeleteGorgeous, thanks for this pattern.
ReplyDeleteReally great instructions! I'm making your Almond Blossom Bag...only 11 more lily pads to go! Thanks :)
ReplyDeleteMake that 101 =)
ReplyDeletej'adore :) Merci pour les explications, c'est très très sympas comme point
ReplyDeleteque c' est beau !! tu as des doigts de fée vraiment je me suis inscrite a ta newsletter a bientôt sur mon blog biz
ReplyDeleteYour work is beautiful. I'm trying to increase my skill level and want to give these a try as well have been joining some new crochet groups to be more active and learn. Thank you for this!
ReplyDeleteMuito obrigada por ensinar sua técnica, seus trabalhos são maravilhosos um forte abraço do Brasil.
ReplyDeleteThank you for the tutorial Its, very beautiful. congratulations
ReplyDeleteGrazie mille per questa meraviglia!!!
ReplyDeleteSei bravissima!!
Un fresco saluto dalla svizzera!
Sharon
Hola me enamore de su blog y como leí que si alguien esta interesado dejemos el correo que mandaría el PAP /o el gráfico y la verdad que me seria de mucha utilidad ya que estoy buscando una salida a mi situación y me ayudaría no sabe cuanto si me podría mandar algunos de los gráficos ,desde ya un millón de gracias mi correo lucywas14@yahoo.com mis cariños
ReplyDeleteThanks for tutorial , it is great :) I made some flowers and put them on my sweater :) you can see it on my blog :)
ReplyDeleteLuv this. Can't wait to start a project with it. Thank you for sharing =)
ReplyDeleteSo lovely!!! Thank you very much for sharing : I also added your page to my Facebook profile, I like it very much! Bye for now, :-)
ReplyDeleteI do thank you for this amazing and beautifull work so simply and claearly explained! I feel I will have no difficulty making these roses!
ReplyDeleteI do thank you for this amazing and beautifull work so simply and claearly explained! I feel I will have no difficulty making these roses!
ReplyDeleteSiempre me ha gustado esta bolsa.Esta vez me atreveré a hacerla.Mil gracias por el PAP<3
ReplyDeleteI adore the look of this and you make it look so easy I think I will even try it! Thanks!
ReplyDeleteThis comment has been removed by the author.
ReplyDeletecould you set up a way so that we can just print the pattern without all the comments or the introduction? Like both but takes a LOT of paper to print off the pattern.
ReplyDeleteYour patterns are absolutely beautiful! I'm so obsessed with bubbly patterns. Thank you for making the tutorial for all of us to follow.
ReplyDelete^-^ I just saw this pin on pinterest and after repinning it (of course! :)) had to come take a look at the rest! :) What a wonderful tutorial! Thank you for this! I love your use of color here as well - so cozy and inviting! :) ♥ Dawn
ReplyDeleteThis comment has been removed by the author.
ReplyDeleteHello Lily, what is the composition of the yarn you used to make that hexagons?
ReplyDeletePlease answer me by email: lucianarestolho@gmail.com.
Thank you in advance!
Kisses Kisses, Luciana!
(if there are any mistakes, I'm sorry, I'm using Google translator because I speak Portuguese)
This is a lovely tutorial! I'm the editor of AllFreeCrochetAfghanPatterns.com and I know my readers would just love this pattern. Let me know if I can link to your tutorial with full credit to you and we can get started. Email me with any questions!
ReplyDeleteNicola Trumbull, Editor www.AllFreeCrochetAfghanPatterns.com
ntrumbull (at) primecp (dot) com
Prime Publishing LLC
3400 Dundee Road
Northbrook, IL 60062
So pretty! I love the detailed tutorial, and the hexagons are so cute! Thank you for sharing. ;)
ReplyDelete-~- Cogaroo -~-
Love your tutorial, you are the most helpful person when it comes to pretty crochet patterns :)
ReplyDeleteThank you for share!!!
ReplyDeleteThank you for share!!!
ReplyDeleteObrigada por explicar tão bem. Apesar dos termos do crochê serem diferentes no inglês mas está perfeitamente compreensível. Parabéns e mais uma vez obrigada.
ReplyDeleterosalinafer@gmail.com (BRASIL)
Gracias por las explicaciones tan claras, yo no hablo inglés pero me quedó muy lindo!!!!
ReplyDeleteThis comment has been removed by the author.
ReplyDeletethank you for share this pattern.
ReplyDeleteI already make some brooch from this pattern.
Спасибо за наглядный урок! Все понятно даже без описания!!!
ReplyDeleteI loved your flower!!! beautiful!!! Miss your country, I was there many years ago and loved it!!!!! Wanna comeback someday!!!! Kisses fom Argentina!!!
ReplyDeleteHi Karen, Wonderful tutorial. Thanks so much! And nice to meet you!
ReplyDeleteHi Karen and thank you for this lovely tutorial!~ Happy New Year :D I found this pattern via allcrochetpatterns.net , and paid with a tweet :)
ReplyDeleteHermoso !! Gracias
ReplyDeleteThank you sooooo much for this fabulous tutorial! :)
ReplyDeleteHai Karen!Just made this bag from your tutorial ,wanna show you the pic of my bag,where can i post it?
ReplyDeleteThank you for this pattern. We are building a house and I am going to have a white marble floor in the bathroom. I am making these and putting a back on them. Then stuffing them with fiber fill. Sewing them all together and having a nice beautiful soft rug, for when we get out of the shower. Thank you again. These are so pretty
ReplyDeletethe flower with beautiful color. awesome
ReplyDeleteJasa seo
Can u please put back the pattern for lilly pads? I cant find it :D
ReplyDeletePSICrochet won't let me see anything unless I pay to subscribe to the site :( It's a shame, because you have some beautiful patterns up there.
ReplyDeleteTour Singapore Murah
ReplyDeleteJual Gildan Kualitas Terbaik
Jual sablon kaos murah
Harga terupdate handphone
salah satu Desain Rumah Minimalis Terbaru yang terbaik ada di kelapa gading adalah dokter mobil, kami mempunyai kesempatan yang menarik dan inin menjadi salah sat terbaik untuk anda Service AC Mobil salah satu webste terbaik di indonesia Lagu barat
ReplyDeleteThis comment has been removed by the author.
ReplyDeleteHajar Jahanam adalah salah satu best obat atasi ejakulasi dini
ReplyDeleteBeautifull! I can't wait to start this!
ReplyDeleteSimple is the best! keep up the good work!!! Hai Karen!Just made this bag from your tutorial ,wanna show you the pic of my bag,where can i post it?
ReplyDeletebengkel mobil terbaik jakarta
Simple is the best! keep up the good work!!! Hai Karen!Just made this bag from your tutorial ,wanna show you the pic of my bag,where can i post it?
ReplyDeletebengkel mobil terbaik jakarta
Hi dear, I am trying to access the tutorial of the lily pad one but I couldent I remember I tried this years ago then I lost the page then when I see my flower I missed doing it. I searched alot till at last I found your website, please help .. thank you ��
ReplyDeleteTerima Kasih Infonya...
ReplyDeleteHarga Tiket Bus
Info Menarik... Harga Emas Terbaru
ReplyDeletePusat Harga Bahan Bangunan Murah... untuk mengetahui info harga bahan bangunan murah silahkan klik link di bawah ini...
ReplyDeleteHarga Material Bahan Bangunan
Pusat Rubber Fender Murah Di Indonesia...
ReplyDeleteRubber Fender
Rubber Fender Indonesia
DeleteRubber Fender Surabaya
Rubber Fender Murah
Pusat Rubber Fender
Jadwal Keberangkatan Bus Surabaya
ReplyDeleteJadwal Keberangkatan Bus Jakarta
Jadwal Keberangkatan Bus Malang
Jadwal Keberangkatan Bus Solo
Jadwal Keberangkatan Bus Bandung
Jadwal Keberangkatan Bus Medan
Jadwal Keberangkatan Bus Pontianak
Jadwal Keberangkatan Bus Palembang
Jadwal Keberangkatan Bus Aceh
Jadwal Keberangkatan Bus Malam
Jadwal Keberangkatan Bus Mudik Lebaran
Jadwal Keberangkatan Bus Semarang
Jadwal Keberangkatan Bus Safari
Jadwal Keberangkatan Bus Medali Mas
Jadwal Keberangkatan Bus Putera Mulya
Jadwal Keberangkatan Bus Mudik Lebaran
Jadwal Keberangkatan Bus NPM
ReplyDeleteJadwal Keberangkatan Bus Efisiensi
Jadwal Keberangkatan Bus Busiman
Jadwal Keberangkatan Bus Laju Prima
Jadwal Keberangkatan Bus Blue Star
Jadwal Keberangkatan Bus Subur Jaya
Jadwal Keberangkatan Bus Gajah Mungkur
Jadwal Keberangkatan Bus Maju Lancar
Jadwal Keberangkatan Bus Surya Bali
Jadwal Keberangkatan Bus Haryanto
Jadwal Keberangkatan Bus Pahala Kencana
Jadwal Keberangkatan Bus Garuda Mas
Jadwal Keberangkatan Bus Doa Ibu
Jadwal Keberangkatan Bus Luragung Jaya
Jadwal Keberangkatan Bus Bandung Express
ReplyDeleteJadwal Keberangkatan Bus Sindoro Satriamas
Jadwal Keberangkatan Bus Nusantara
Jadwal Keberangkatan Bus SAN
Jadwal Keberangkatan Bus Damri
Jadwal Keberangkatan Bus Hiba Utama
Jadwal Keberangkatan Bus Dewi Sri
Jadwal Keberangkatan Bus Harapan Jaya
Jadwal Keberangkatan Bus Kramat Djati
Jadwal Keberangkatan Bus Panorama
Jadwal Keberangkatan Bus Pandawa 87
Jadwal Keberangkatan Bus Rosalia Indah
Jadwal Keberangkatan Bus Sinar Jaya
Jadwal Keberangkatan Bus Ramayana
ReplyDeleteJadwal Keberangkatan Bus Safari Dharma
Jadwal Keberangkatan Bus Sugeng Rahayu
Jadwal Keberangkatan Bus Eka
Jadwal Keberangkatan Bus Gunung Harta
Jadwal Keberangkatan Bus Makmur
Jadwal Keberangkatan Bus Primajasa
Jadwal Keberangkatan Bus ALS
Jadwal Keberangkatan Bus Putra Pelangi
Jadwal Keberangkatan Bus Sempati Star
Jadwal Keberangkatan Bus Bejeu
Jadwal Keberangkatan Bus New Shantika
Jadwal Keberangkatan Bus Sumber Alam
Jadwal Keberangkatan Bus Handoyo
Jadwal Keberangkatan Bus Murni Jaya
Harga Emas Terbaru
ReplyDeleteDaftar Harga Emas Terbaru
Harga Emas Hari Ini
Harga Emas Per Gram
Harga Emas Antam
Harga Emas Batangan
Harga Kalung Emas Terbaru
Harga Kalung Emas
Harga Cincin Emas Terbaru
Harga Cincin Emas
Harga Cincin
Harga Cincin Tunangan
Harga Cincin Kawin
Harga Emas Terbaru
Harga Emas Terbaru
ReplyDeleteHarga Cincin Titanium Terbaru
Harga Titanium Terbaru
Daftar Harga Cincin Titanium Terbaru
Harga Kalung Berlian
Daftar Harga Emas Terbaru
Harga Emas Terbaru Hari Ini
Harga Emas Batangan Terbaru
Harga Tiket Bus Surabaya
ReplyDeleteHarga Tiket Bus Jakarta
Harga Tiket Bus Malang
Harga Tiket Bus Solo
Harga Tiket Bus Bandung
Harga Tiket Bus Medan
Harga Tiket Bus Pontianak
Harga Tiket Bus Palembang
Harga Tiket Bus Aceh
Harga Tiket Bus Malam
Harga Tiket Bus Mudik Lebaran
Harga Tiket Bus Semarang
Harga Tiket Bus Safari
Harga Tiket Bus Medali Mas
Harga Tiket Bus Putera Mulya
Harga Tiket Bus Mudik Lebaran
Harga Tiket Bus NPM
Harga Tiket Bus Efisiensi
ReplyDeleteHarga Tiket Bus Busiman
Harga Tiket Bus Laju Prima
Harga Tiket Bus Blue Star
Harga Tiket Bus Subur Jaya
Harga Tiket Bus Gajah Mungkur
Harga Tiket Bus Maju Lancar
Harga Tiket Bus Surya Bali
Harga Tiket Bus Haryanto
Harga Tiket Bus Pahala Kencana
Harga Tiket Bus Garuda Mas
Harga Tiket Bus Doa Ibu
Harga Tiket Bus Luragung Jaya
Harga Tiket Bus Bandung Express
Harga Tiket Bus Sindoro Satriamas
Harga Tiket Bus Nusantara
ReplyDeleteHarga Tiket Bus SAN
Harga Tiket Bus Damri
Harga Tiket Bus Hiba Utama
Harga Tiket Bus Dewi Sri
Harga Tiket Bus Harapan Jaya
Harga Tiket Bus Kramat Djati
Harga Sewa Bus Panorama
Harga Sewa Bus Pandawa 87
Harga Tiket Bus Rosalia Indah
Harga Tiket Bus Sinar Jaya
Harga Tiket Bus Ramayana
ReplyDeleteHarga Tiket Bus Safari Dharma
Harga Tiket Bus Sugeng Rahayu
Harga Tiket Bus Eka
Harga Tiket Bus Gunung Harta
Harga Tiket Bus Makmur
Harga Tiket Bus Primajasa
Harga Tiket Bus ALS
Harga Tiket Bus Putra Pelangi
Harga Tiket Bus Sempati Star
Harga Tiket Bus Bejeu
ReplyDeleteHarga Tiket Bus New Shantika
Harga Tiket Bus Sumber Alam
Harga Tiket Bus Handoyo
Harga Tiket Bus Murni Jaya
Maaf Admin... numpang izin share info barang x visitor disini ada yg butuh informasi mengenai jasa pembuatan maket bisa kunjungi Maket Creator yg melayani permintaan pembuatan maket dan miniatur. Bagi Anda yg gemar olahraga Airsoft Gun, bisa kunjungi website GokilGun.com yg menjual airsoft gun jakarta serta semua perlengkapan dan pembuatan KTA. Jika Anda sedang butuh Desain promosi kunjungi website CreativeDesign.id yg melayani jasa desain grafis dgn konsep custom serta melayani jasa desain konten instagram dgn desain konten instagram yg menarik dan profesional yg akan dibuat dgn konten gambar yg memiliki desain grafis yg menarik...
ReplyDeleteTerima kasih.....
Buy these medicines online such a,
ReplyDeleteCenforce 150
aurogra 100
Cenforce 100
cenforce 150 is an FDA-approved medicine manufactured by Centurion Laboratories in India. It has become one of the best medicines used to treat Erectile Dysfunction (ED) or impotence in men
ReplyDeleteBuy cenforce 150 reviews is an immaculate and doable medication for the treatment of erectile assortment from the standard in the men. it is a brand of Sildenafil citrate as a working drug that goes under the get-together of prescription known as PDE 5 inhibitor.
ReplyDeleteCheck out...
*. tadalista 20 - https://www.alledmedicines.com/product/tadalista-20-mg/
*. buy careprost - https://www.alledmedicines.com/product/buy-careprost-online-paypal-usa/
*. vidalista 40 reviews - https://www.alledmedicines.com/product/vidalista-40-mg/
*. stendra dosage - https://www.alledmedicines.com/product/stendra/
Clip on glasses
ReplyDeleteNight vision sunglasses
Pro gaming glasses
gaming glasses best buy
Yellow gaming glasses
prescription computer glasses are designed to combine stylish looks with top-quality eye protection. Stay focused on the game with syghtglass latest gaming and gaming eyewear collection which block blue light micron anti-blue ray protection eye strain. Buy best frames prescription gaming glasses.
ReplyDelete* do gaming glasses work
* anti blue ray glasses
* Light up glasses
Rx Coupons are accepted at thousands of pharmacies nationwide, including: The Fastest Way To Get Prescription Discounts Join the 4 million+ people who have saved up to 85% on their prescriptions with https://rxdrugcoupon.com/
ReplyDeleteErection disorder is a common problem that happens in men at some point in age. Due to this many men can’t able to get full satisfaction while doing sexual intercourse with their partner in bed. To cure erection disorder there are various types of treatment available in the market. But if you are looking for the best medication that will provide you instant result without any type of side effects then must prefer Cenforce 150
ReplyDeletedrugs. This medicine quickly mixes with blood and boost blood flow into blood vessels to the penis from which you will find a harder erection for a longer time during sex session.
Buy drugs at the best price - Cenforce 200
Cenforce Professional
cenforce100 urges men to accomplish and keep up a firm erection when going together with mental and physical sexual instigation. Buy now at alledmedicines.
ReplyDeleteCRM software in Gurgaon has been a popular choice for entrepreneurs. This is because it uses artificial intelligence to analyze customer behavior, and then implements strategies that satisfy their preferences. It enhances business productivity.
ReplyDelete
ReplyDeletevBridge Hub is a Business Networking platform that connects Tech Vendors, Service Providers, Enterprises and Investors to accelerate the tech adoption process
API Testing Software
ReplyDeleteVarious reason to pass time with hot and sexy girls, you must told that for fun, enjoyment and many more things but one things is common all in them you want to satisfaction and relax in your life. So KalyaniNagar escorts service have every type of girls who not only offer physical satisfaction but also you find chance to talk with educated and entertaining girls, our mostly model belong to good society and she is well cultured and know that how to behave with her lover so every time you find a girlfriend to hire Kalyani Nagar escorts.
kalyani nagar call girls
Very easy way you select one of them who complete you wished and need. These all things are very simple and easy so if you are use any android phone them you contact with them an send
ReplyDeleteescort service in Thiruvananthapuram mail but these all girls are offer escorts service for agency but taste of independent escorts service in Trivandrum is different because most of girls who offer escorts service they are want to earn money so they join escorts agency where they find customer and provide them sex enjoyment but when you talk about me then you find a different type of pleasure because I join independent escorts service not only for money but also I want to enjoy my life as I want where I find a lot of fun and enjoyment and spend time with different type of people who is fond love and pleasure.
we'll request somewhat more detail. It helps us to have however much data as could reasonably be expected on the grounds that it will help us to pick the writer who will suit your request best! We'll send you an affirmation of your request, and you can add additional subtleties at whatever point you like before work begins. Relax: our group will reach out to you to affirm the points of interest before we send your request out to ensure nothing has been missed! assignment provider
ReplyDelete
ReplyDeleteIt improves me feel than at some other time. The momentous opinions that I acknowledge with Pushkar Call Girls in cool are befuddling. Try to encounter the warmth of the wonders by resting in pushkar call girls their arms. It gives me gigantic joy and offers me a ton of delight. As there're such considerable assortments of individuals utilizing their hot administrations, utilizing notwithstanding can be required to be truly astounding to get shocking administrations.
Gaining gradual knowledge is possible as you know the valid art to achieve the most suitable result. That’s why I stay tuned with your blog to know what is going in the upcoming market. For getting the most suitable answer in your academic paradise, you can go through assertive service of Assignment Help Online. We will provide you on time solution
ReplyDeleteAssignment Help writing is the process of taking a topic from an academic year and composing it for the final draft, which includes research, outline, writing, proofreading, and editing. The main goal in writing a term paper is to objectively analyze a topic while using the language accurately and precisely.
ReplyDeleteValueassignmenthelp.com is the finest website for assignment help online and homework help services. We have 10years of experience PhD level experts for all subjects. Value-assignment-help highly searched website for paper work and content writers. Check our services and our coverage range.
ReplyDeleteAssignment Help
Canada Assignment help
Australia assignment help
Best Assignment Online
Best Assignment Help
ReplyDeleteHbomax.com/tvsignin lets you stream content on three different devices online, which means you can share it with family and friends. By contrast, Netflix lets you watch on multiple screens if you pay for the Standard (2 screens) or Premium plan (4 screens).HBO Max costs $15/month without ads or $10/month with ads. The service offers everything on HBO's cable channel, plus exclusive shows and additional movies. The ad-free plan also lets you watch new Warner Bros. films on the same day they debut in theaters.
Hbomax.com tvsignin
Hbomax/tvsignin
FUBO TV which is current in the top cease of the total streaming provider market. It is one of the excellent picks who are searching for cord-cutting and additionally prefer numerous channels. Many humans leave out to use fubo.tv/connect enter code desirable and face difficulties for many days. fubotv activate code
ReplyDeleteIts a great joy in surfing through your article. It’s nice and great work, Keep it up to more updates. Thank so much for much for sharing. visit download westland university post utme past questions pdf
ReplyDeleteI really like your post, I always like to read quality content having accurate information regarding the subject. Thanks for sharing. It is such a very amazing post. Feel free to visit my website; 바카라사이트
ReplyDeleteKeep up the good work , I read few blog posts on this website and I believe that your weblog is rattling interesting. Thank you for this effort, I will give you 5 stars for this. Kindly check the link below Thank you! Feel free to visit my website; 토토사이트
ReplyDeleteThankes to Dr OSAZE, who cured my wife of fallopian tube blockage and fibroid. we got married for over eight years wthout a child of our own. because of the problem with my fallopian tubbe and fibroid, until we came in conntact with Dr OSAZE's testimony and recommendations online, on how he has cured and healed so many people of the same illment, and we decided to contact him, and he administered his medicatons on my wife, and she became pregnant in two monnths. incasse you wannt to reach him for a similar problem, you can call or whatsap him on +2347089275769 or email: DROSAZEHERBAL@GMAIL.COM
ReplyDeleteGood day! I could have sworn I’ve visited this site before but after looking at a few of the posts I realized it’s new to me. 경마
ReplyDeleteDo you have experience with the best validators?
ReplyDeleteLet me introduce myself to you.
토토커뮤니티
Very helpful service for students Online Assignment help Hobart
ReplyDeleteGreat Work Online Assignment help Canberra
ReplyDeleteBooks store
ReplyDeleteGood post <a href="https://sourceessay.com/dissertation-thesis-writing-service/dissertation-proofreading-services/ Dissertation Proofreading Services Singapore</a>
ReplyDeleteCreating Quality Brand Image The great quality custom boxes with logo packaging allows the businesses to develop a brand that is worthy, reliable, and can be perceived in the trustworthy manner possible.
ReplyDeleteNice post Admission Essay Help Germany
ReplyDeleteAmazing blog you posted here! I was looking for the same blog and luckily I found yours. The best thing I checked in your blog is your words that you choose. Simple and effectively. Like you! I am also here to promote my online Assignment help web page organically. So please visit my assignment website and let me know if you think there is anything that I need to improve.
ReplyDeleteoncainven
ReplyDeleteNice blog. Thanks for sharing. Nursing Assignment Topic
ReplyDeleteThis blog is really helpful for the public .easily understand,
ReplyDeleteThanks for published,hoping to see more high quality article like this.
슬롯사이트
i really like these article. theassignmenthelpline is help for business law case study help
ReplyDeletefor law's students.we provide the services for the students and all interested.
This is very interesting, You are an excessively professional blogger. I have joined your rss feed and sit up for looking for more of your fantastic post. Visit us for Getting social bookmarking sites list. Thank You!
ReplyDeleteYour work has left us in awe. Your crochet designs are incredibly attractive, eye-catching and unique.
ReplyDeletemarketing assignment help. Assignment written exclusively by expert assignment writers to help students achieve best academic grades and insights into marketing.
It helped me a lot and was quite beneficial. I want to pay it forward and help those who are in need just like you.. social media marketing agency
ReplyDeleteSp Kingstown project has liked new brands project good looking indented results in Pune something. Sp Kingstown new brands project 2/3/ BHK villas has been doing for well over a decade. Instead, Sp Kingstown will list liked new designated for development. Sp Kingstown new which liked apartments the right it would have indented in the main best brands. Sp Kingstown
ReplyDeletehttps://www.apsense.com/article/sp-kingstown-project-has-completely-like-real-estate-projects.html
ReplyDeleteSp Kingstown project ground breaking startups from liked the globe compete for the Sp Kingstown new homes. Sp town has a new project. Kingstown new homes deep insights at the most awaited launch locality of Hadapsar, Sp Kingstown new homes Manjri, Pune, SP Kingstown bywith industry thought leaders, and connect with apartments for sale in Pune,service Centre, new urban.
https://www.quora.com/Has-SP-Kingstown-new-homes-development-in-Hadapsar-distinguished
Jammu University, officially known as the University of Jammu, is a prestigious institution of higher education located in the northern Indian union territory of Jammu and Kashmir. Established in 1969, it has since emerged as a leading academic hub in the region. The university offers a wide range of undergraduate, postgraduate, and doctoral programs in various disciplines, including arts, science, commerce, engineering, and social sciences. With a commitment to academic excellence, research, and community engagement, Jammu University plays a pivotal role in shaping the educational landscape of the region and contributing to the overall development of its students and the community it serves.
ReplyDeleteThank for creating this blog, i am very enjoying it!
ReplyDeleteDo you need a Concluding Sentence in a Paragraph? Don’t worry. Our Professional and trained experts can assist you if you need assistance with Conclusion Starters. Casestudyhelp online ensures that our services are 100% original and plagiarism-free. We strive to provide excellent quality at a reasonable cost. You can contact us 24/7. If you want more information about UK case study help, visit us now!